How to Setup DJI O4 Lite Air Unit in FPV Drones
How to Setup DJI O4 Lite Air Unit in FPV Drones: The Ultimate 2026 Guide
If you are building a lightweight FPV drone and want crystal-clear digital video without adding excessive weight, the DJI O4 Lite Air Unit is exactly what you need. Learning how to setup DJI O4 Lite Air Unit in FPV drones properly is the difference between a frustrating build and a flawless flying experience. In this comprehensive guide from Mall of Aviation, we will walk you through every step—from mounting and wiring to Betaflight configuration and the best settings for performance, latency, and video quality. Whether you are a beginner or an experienced pilot, this guide will ensure your DJI O4 Lite is optimized for your specific FPV drone build.
Table of Contents
- Where to Buy DJI O4 Lite
- Mounting the DJI O4 Lite
- Power Requirements & Best Practices
- Flight Controller Wiring Diagram
- Activation & Firmware Update
- Pairing with DJI Goggles
- Betaflight OSD Setup for DJI O4 Lite
- Camera & Recording Settings
- Video Stabilization: RockSteady vs Gyroflow
- How to Avoid Jello & Vibration
- Best DJI O4 Lite Settings for FPV
- Race Mode Explained
- Frequently Asked Questions
- Conclusion
Where to Buy DJI O4 Lite Air Unit
Before diving into how to setup DJI O4 Lite Air Unit in FPV drones, you need to ensure you are purchasing from a reliable source. The DJI O4 Lite is available at most major FPV retailers. Here are trusted options:
- GetFPV – Fast shipping within the US
- RaceDayQuads (RDQ) – Excellent customer support
- Amazon – Convenient for Prime members
- AliExpress – Often the most affordable option
One important note: DJI currently does not sell spare parts separately for the O4 Lite. If the camera or main board gets damaged, you may need to replace the entire unit. However, antennas are replaceable and widely available.
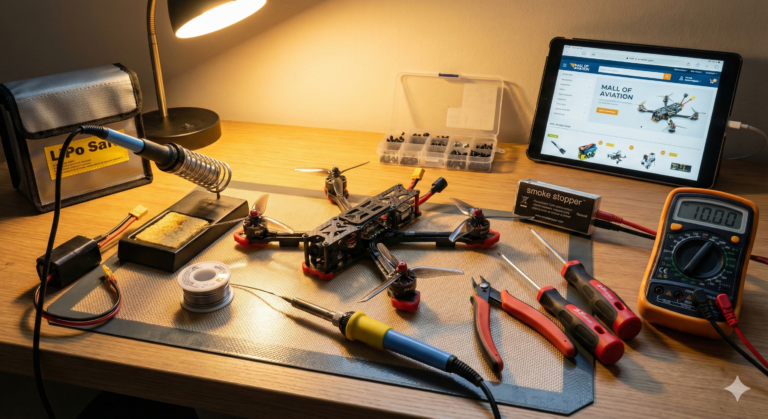
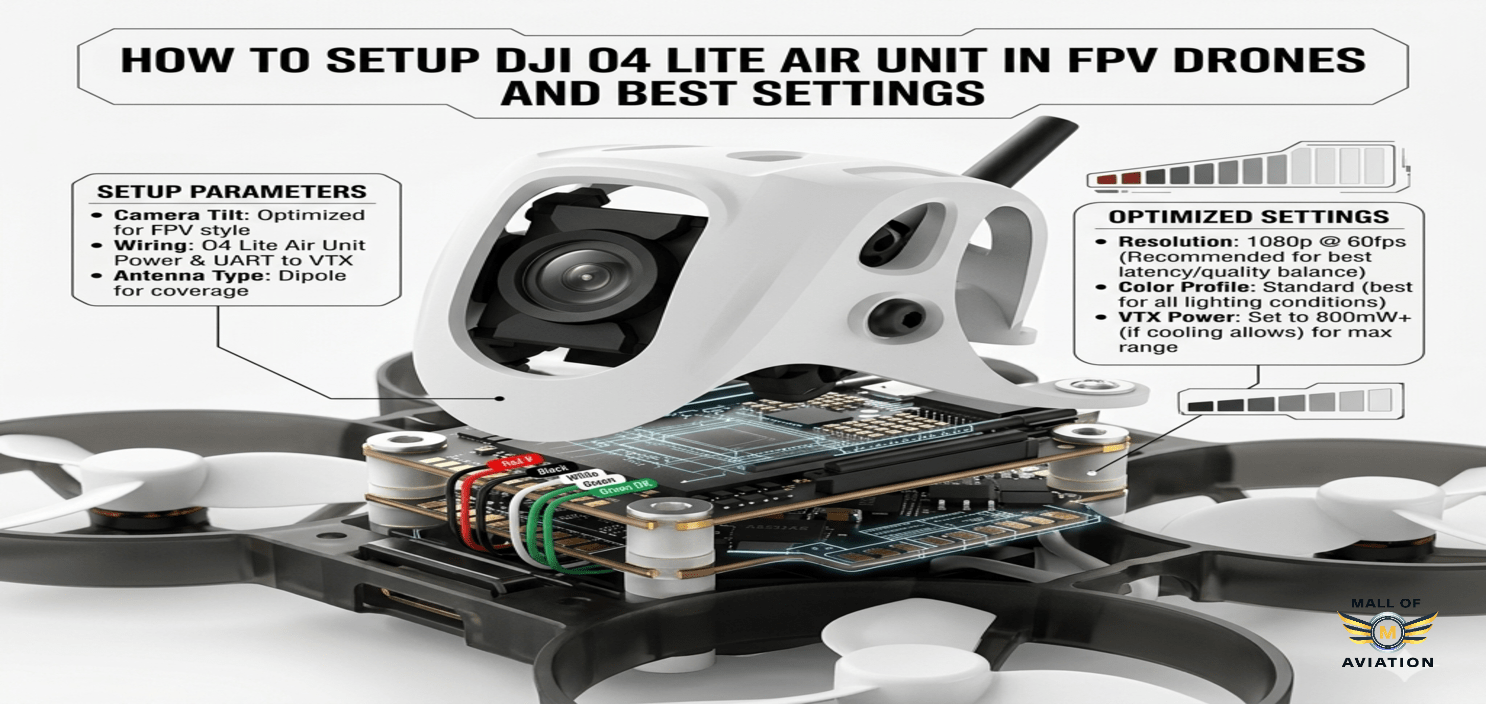
Mounting the DJI O4 Lite Air Unit
Proper mounting is the first critical step when learning how to setup DJI O4 Lite Air Unit in FPV drones. The O4 Lite is specifically designed for micro FPV drones, making it ideal for:
- 75mm to 85mm Tinywhoops
- 2-inch and 2.5-inch micro quads
- Lightweight 3-inch freestyle builds
The unit features a 25.5 x 25.5mm mounting pattern, which matches most modern flight controller stacks. However, the camera cable is only 5cm long, which can restrict placement options. For best results:
- Use frames specifically designed with O4 Lite compatibility in mind
- Secure the antenna using zip ties or a TPU canopy mount
- Keep the air unit away from motor wires and high-current power leads
- Use soft mounting (silicone grommets) to reduce vibration transfer
Power Requirements & Best Practices
The DJI O4 Lite operates on a voltage range of 3.7V to 13.2V, which means it can run directly on 1S, 2S, or 3S LiPo batteries. However, direct battery power is not recommended for stability. To properly complete how to setup DJI O4 Lite Air Unit in FPV drones, follow these power guidelines:
- Best Practice: Use a 5V or 9V BEC from your flight controller
- Minimum Requirement: 5V with at least 2A current capacity
- Avoid: Voltage drops below 3.7V, which can cause the unit to reboot mid-flight
If you are building a 4S or 6S drone, always use a BEC to step down voltage. Connecting the O4 Lite directly to a 4S or higher battery will instantly destroy the unit.
Flight Controller Wiring for DJI O4 Lite
The wiring stage is the most technical part of how to setup DJI O4 Lite Air Unit in FPV drones. The unit uses a standard 6-pin connector. Here is the pinout:
- VCC: Power input (5V-13.2V)
- GND: Ground
- RX: UART receive (for OSD data)
- TX: UART transmit (for OSD data)
- SBUS: For DJI remote receiver (optional)
Important Wiring Notes:
- If you are using ExpressLRS, Crossfire, or another external receiver, do NOT connect the SBUS wire. Leaving it connected can cause interference or conflict with your main receiver.
- Connect RX and TX to an available UART on your flight controller. For example, if you use UART2, connect the air unit TX to FC RX2, and air unit RX to FC TX2.
- Always double-check voltage polarity before powering on.
Activation & Firmware Update
Before using your DJI O4 Lite for the first time, activation is required. This is a crucial step in how to setup DJI O4 Lite Air Unit in FPV drones. Follow these steps:
- Download and install DJI Assistant 2 (FPV Series) on your computer.
- Connect the O4 Lite to your computer via USB-C.
- Power the unit using a battery or BEC.
- Open DJI Assistant 2 and log in to your DJI account.
- Follow the on-screen prompts to activate the device.
- Check for firmware updates and install the latest version to ensure compatibility with your goggles.
Keeping firmware updated ensures you have the latest features and bug fixes. It also prevents compatibility issues with newer DJI goggles.
Pairing DJI O4 Lite with DJI Goggles
After activation, the next step in how to setup DJI O4 Lite Air Unit in FPV drones is pairing with your goggles. The O4 Lite is compatible with:
- DJI Goggles 3
- DJI Goggles N3
- DJI Goggles 2
- DJI Integra
To bind the air unit to your goggles:
- Put your goggles into binding mode (usually found in the settings menu).
- Press and hold the bind button on the O4 Lite air unit for about 3 seconds.
- Wait for the LED indicator to turn solid green, indicating successful pairing.
If binding fails, try moving the air unit closer to the goggles and repeat the process.
Betaflight OSD Setup for DJI O4 Lite
To get flight data like battery voltage, RSSI, and flight mode on your goggles, you need to configure Betaflight. This is a vital part of how to setup DJI O4 Lite Air Unit in FPV drones. Here is how to do it:
- Open Betaflight Configurator and connect your flight controller.
- Navigate to the Ports tab.
- Find the UART you connected the air unit to (e.g., UART2).
- Enable Peripherals and select DJI FPV (VTX).
- Click Save and Reboot.
- Go to the Presets tab and search for DJI OSD.
- Apply the preset that matches your setup.
- Navigate to the OSD tab and customize your layout.
Set the Video Format to HD to ensure proper scaling. You can now see your flight data through the DJI goggles.
Camera & Recording Settings for DJI O4 Lite
The DJI O4 Lite camera is capable of high-quality recordings. Understanding these options is essential when perfecting how to setup DJI O4 Lite Air Unit in FPV drones for your specific flying style. Supported resolutions:
- 4K at 60fps
- 1080p at 100fps
- 1080p at 120fps
The unit comes with 23GB of internal storage. There is no SD card slot, so you must offload footage via USB-C. To record, simply press the record button on the air unit or use the control button on your goggles if supported.
Video Stabilization: RockSteady vs Gyroflow
When learning how to setup DJI O4 Lite Air Unit in FPV drones, you will encounter two stabilization options:
- RockSteady: Built-in electronic image stabilization. Great for quick edits but adds a slight crop.
- Gyroflow: Post-processing software that uses gyro data for ultra-smooth stabilization. Requires recording gyro data.
For the highest quality footage, most experienced pilots turn OFF RockSteady and use Gyroflow later. This gives you more control and preserves the full field of view.
How to Avoid Jello & Vibration with DJI O4 Lite
Jello (wavy distortion in video) can ruin otherwise great footage. Here is how to prevent it while mastering how to setup DJI O4 Lite Air Unit in FPV drones:
- Soft Mount the Air Unit: Use silicone grommets or double-sided foam tape.
- Avoid Direct Carbon Mounting: Carbon fiber transmits vibrations directly to the unit.
- Use 48kHz PWM on ESCs: This reduces motor noise and vibrations.
- Secure the Camera Cable: A loose cable can vibrate and cause micro-jitter.
- Balance Your Propellers: Unbalanced props are a primary source of vibrations.
Best DJI O4 Lite Settings for FPV
Optimizing your settings is the final step in how to setup DJI O4 Lite Air Unit in FPV drones. Here are recommended configurations for different use cases.
Low Latency Settings (Best for FPV Flying & Racing)
- Resolution: 1080p @ 100fps
- Aspect Ratio: 4:3
- Field of View: Wide
- ISO: Auto
- Stabilization: Off
Best Video Quality Settings (For Cinematic Footage)
- Resolution: 4K @ 60fps
- Aspect Ratio: 16:9
- Exposure Mode: Manual
- Shutter Speed: 1/120 (double your frame rate)
- ISO: Keep as low as possible (100-400)
Race Mode Explained
Race Mode is a special feature that reduces latency to approximately 20ms. This can be a game-changer for competitive pilots. When implementing how to setup DJI O4 Lite Air Unit in FPV drones for racing, consider these trade-offs:
- Pros: Ultra-low latency, responsive feel
- Cons: Reduced range, lower transmission power, 20MHz bandwidth only
Race Mode is best used in controlled environments like race tracks. For freestyle or long-range flying, stick to standard mode for better range and reliability.
Frequently Asked Questions About DJI O4 Lite Setup
1. Why is my DJI O4 Lite not recording?
If the unit does not record, connect it to your computer via USB and format the internal storage. Ensure you have enough free space.
2. Can I use the DJI O4 Lite with a 6S battery?
No. The O4 Lite only supports up to 3S (13.2V). For 4S or 6S drones, use a 5V or 9V BEC from your flight controller to power the unit safely.
3. Does the DJI O4 Lite support an SD card?
No, it features 23GB of internal storage. You must offload footage via USB-C connection.
4. Is the DJI O4 Lite good for cinematic flying?
It is capable, but the O4 Pro offers superior dynamic range and image quality for cinematic work. The O4 Lite is better suited for micro drones and freestyle.
5. How do I reduce latency on my DJI O4 Lite?
Use 1080p at 100fps and enable Race Mode if you are in a close-range environment.
6. What is the best way to learn how to setup DJI O4 Lite Air Unit in FPV drones?
Follow this guide step by step, and always double-check wiring before applying power. Using a smoke stopper during initial power-up is highly recommended.
Conclusion: Master Your DJI O4 Lite Setup
Learning how to setup DJI O4 Lite Air Unit in FPV drones is a worthwhile investment that transforms your flying experience. With its lightweight design, excellent video quality, and low latency, the O4 Lite is one of the best digital systems for micro FPV builds. By following this comprehensive guide from Mall of Aviation, you can avoid common pitfalls and get the most out of your equipment.
Remember to keep your firmware updated, secure your wiring, and optimize your settings based on whether you are racing, freestyling, or capturing cinematic footage. A properly configured DJI O4 Lite will deliver reliable video transmission and stunning recordings flight after flight.
If you are building a new drone or upgrading an existing one, refer to our FPV Beginner Build Guide and Best Micro Drone Frames for more inspiration. Happy flying from Mall of Aviation