
How to setup My First Own Drone and Robotics Lab!

Hey everyone! 👋
I get asked this all the time. People see me working at Atom Aviation as an R&D Engineer and think I have some secret, high-tech NASA bunker for my projects. But honestly? You don’t need a million-dollar facility to start building cool stuff. You just need the right corner in your room and some solid gear.
Since I spend my days designing drones and my nights dreaming about them (typical engineer life, right?), I thought I’d share exactly how to set up your own Drone and Robotics Lab at home without going crazy.
I’ve dug through Mall of Aviation to find the exact stuff I’d buy if I were starting from scratch today. Let’s get into it! 👇
1. The “Operations Table” (Your Workbench) 🛠️
First off, do NOT burn your dining table. Your mom (or partner) will kill you. Trust me. You need a dedicated workspace that can handle heat and mess.
You absolutely need a silicone mat. It saves your table from solder burns and keeps your tiny screws from rolling into the void.
Comparison Time: Which Mat to Pick? 🤔 I found two cool options on the site:
-
Option A: The Classic Soldering Mat | Heat-Resistant Work Surface (₹900)
-
Why I like it: It’s simple, does the job, and handles heat up to 500°C. If you just need a safe place to solder, this is it.
-
-
Option B: The ESD S-160 Anti-Static Magnetic Mat (₹900)
-
Why I like it: This one is my favorite. It has magnetic slots! If you are like me and always lose those tiny M3 screws, the magnets are a lifesaver. Plus, it has specific slots for IC chips.
-
Verdict: Go for the ESD S-160 if you are doing heavy electronics work. The price is basically the same, so why not get the magnets?
2. The Power Systems (ESCs) ⚡
You can’t have a robotics lab without testing motors and speed controllers. When you are prototyping, you need reliable Electronic Speed Controllers (ESCs).
Comparison Time: Choosing Your Power Level 🔋
-
For Lightweight/Agile Builds: E-Power Plus 25A High RPM ESC (₹6,080)
-
The vibe: Perfect for smaller FPV drones or planes where you want to save weight. It supports 2-4S batteries. Good for “park flyer” type projects.
-
-
For The Beast Mode: E-Power Plus 50A High RPM ESC (₹8,636)
-
The vibe: This is for when you want serious power. It handles higher current and is built for speed. If you are building a racing rig or a heavy-lift bot, don’t cheap out—get this one.
-
My take: If you are just starting, grab the 25A. But if you know you’re going to build a monster drone later, future-proof your lab with the 50A version.
3. The Eyes (Camera Testing) 📷

A robotics lab isn’t complete without testing vision systems. Whether you are flying FPV or building an autonomous rover, you need a good camera feed.
I recommend the Caddx Ratel 2 (1200TVL). Why? Because it has a “Starlight” sensor. That means even if you are working late at night in your room with dim lights (we’ve all been there), the image is still crisp. It’s a staple in any FPV toolkit.
4. Essential Tools 🔧
You can’t build with bare hands! Make sure you stock up on these small essentials from the store:
-
Wire Strippers: Don’t use your teeth. Please.
-
Flux: Makes your soldering look professional instead of a gloopy mess.
5. The Skeleton: Choosing Your Frame 🦴
Every lab needs a project to work on. If you are building your first FPV drone or a long-range cruiser, the frame is where it all starts.
The Showdown: Agile vs. Beast Mode
-
For Freestyle & Speed: Mark4 5-inch Carbon Fiber Frame (₹2,300)
-
The Vibe: This is the classic. It’s lightweight (225mm wheelbase), super durable, and perfect for bashing around the park. If you crash this (and you will), it can take a beating.
-
-
For Long Range Missions: Shadow X 15″ FPV Frame Kit (₹7,499)
-
The Vibe: This thing is massive. It’s built for heavy lifting and long-distance flights. If you want to carry big cameras or fly for 30+ minutes, this is the frame I’d pick for a serious R&D project.
-
My Verdict: Start with the Mark4. It’s cheaper and easier to learn on. Save the Shadow X for your second build!
6. The Muscle: Motors That Scream 🚀
Your drone is nothing without power. Brushless motors are the heart of the operation.
Comparison: Budget vs. Premium Performance
-
The Budget King: Emax ECO II 2807 1300KV (~₹1,830)
-
Why I like it: Emax makes solid gear that doesn’t cost a fortune. These motors are reliable and give you great thrust for the price.
-
-
The High-End Performer: GEPRC EM3115 900KV Motor (₹2,895)
-
Why I like it: If you are building that 7-inch or 10-inch long-range drone, you need torque. These motors are incredibly smooth and efficient for 6S battery setups.
-
-
The “Old Reliable”: DYS D3530 1700KV (~₹1,399)
-
Why I like it: Perfect for fixed-wing planes or simpler quadcopters. It’s cheap and gets the job done.
-
7. The Brains: Flight Controllers (The Stack) 🧠
This is the most critical part of your lab inventory. The Flight Controller (FC) and ESC (Electronic Speed Controller) tell your motors what to do.
The Comparison: Standard vs. Pro Stack
-
The “Just Works” Option: GEPRC TAKER F405 BLS 60A V2 Stack (₹7,500)
-
The Lowdown: This is an F405 flight controller paired with a 60A ESC. It handles plenty of power and runs Betaflight smoothly. For 90% of pilots, this is all you need.
-
-
The “R&D Grade” Option: MicoAir H743v2 70A AM32 Stack (₹10,999)
-
The Lowdown: This uses the H7 processor (faster than F405) and runs AM32 firmware on the ESCs. It’s smoother, handles higher currents (70A!), and is future-proof.
-
-
The Industrial Overkill: JIYI KX Flight Controller Kit (VTOL) (₹84,989)
-
The Lowdown: Okay, only buy this if you are building a massive agricultural or surveillance drone like we do at Atom Aviation. It’s for autonomous missions, not freestyle.
-
My Pick: Grab the GEPRC Taker Stack. It’s the best bang for your buck.
8. Control & Power: The Lab Essentials 🔋📡
Finally, you need a way to talk to your drone and keep it powered.
-
The Radio: Radiomaster Boxer
-
Don’t buy a toy controller. The Boxer is ergonomic, powerful, and uses EdgeTX. It feels like pro equipment in your hands.
-
-
The Charger: HOTA D6 Pro 325W Charger (₹10,500)

-
Why this one? It has wireless charging on top! You can charge your drone batteries and your phone at the same time while you work. It’s a dual-channel charger, so you can charge two batteries at once. A total time-saver in the lab.
-

9. Adding “Superpowers” (Sensors & AI)
A professional drone doesn’t just fly; it thinks.
-
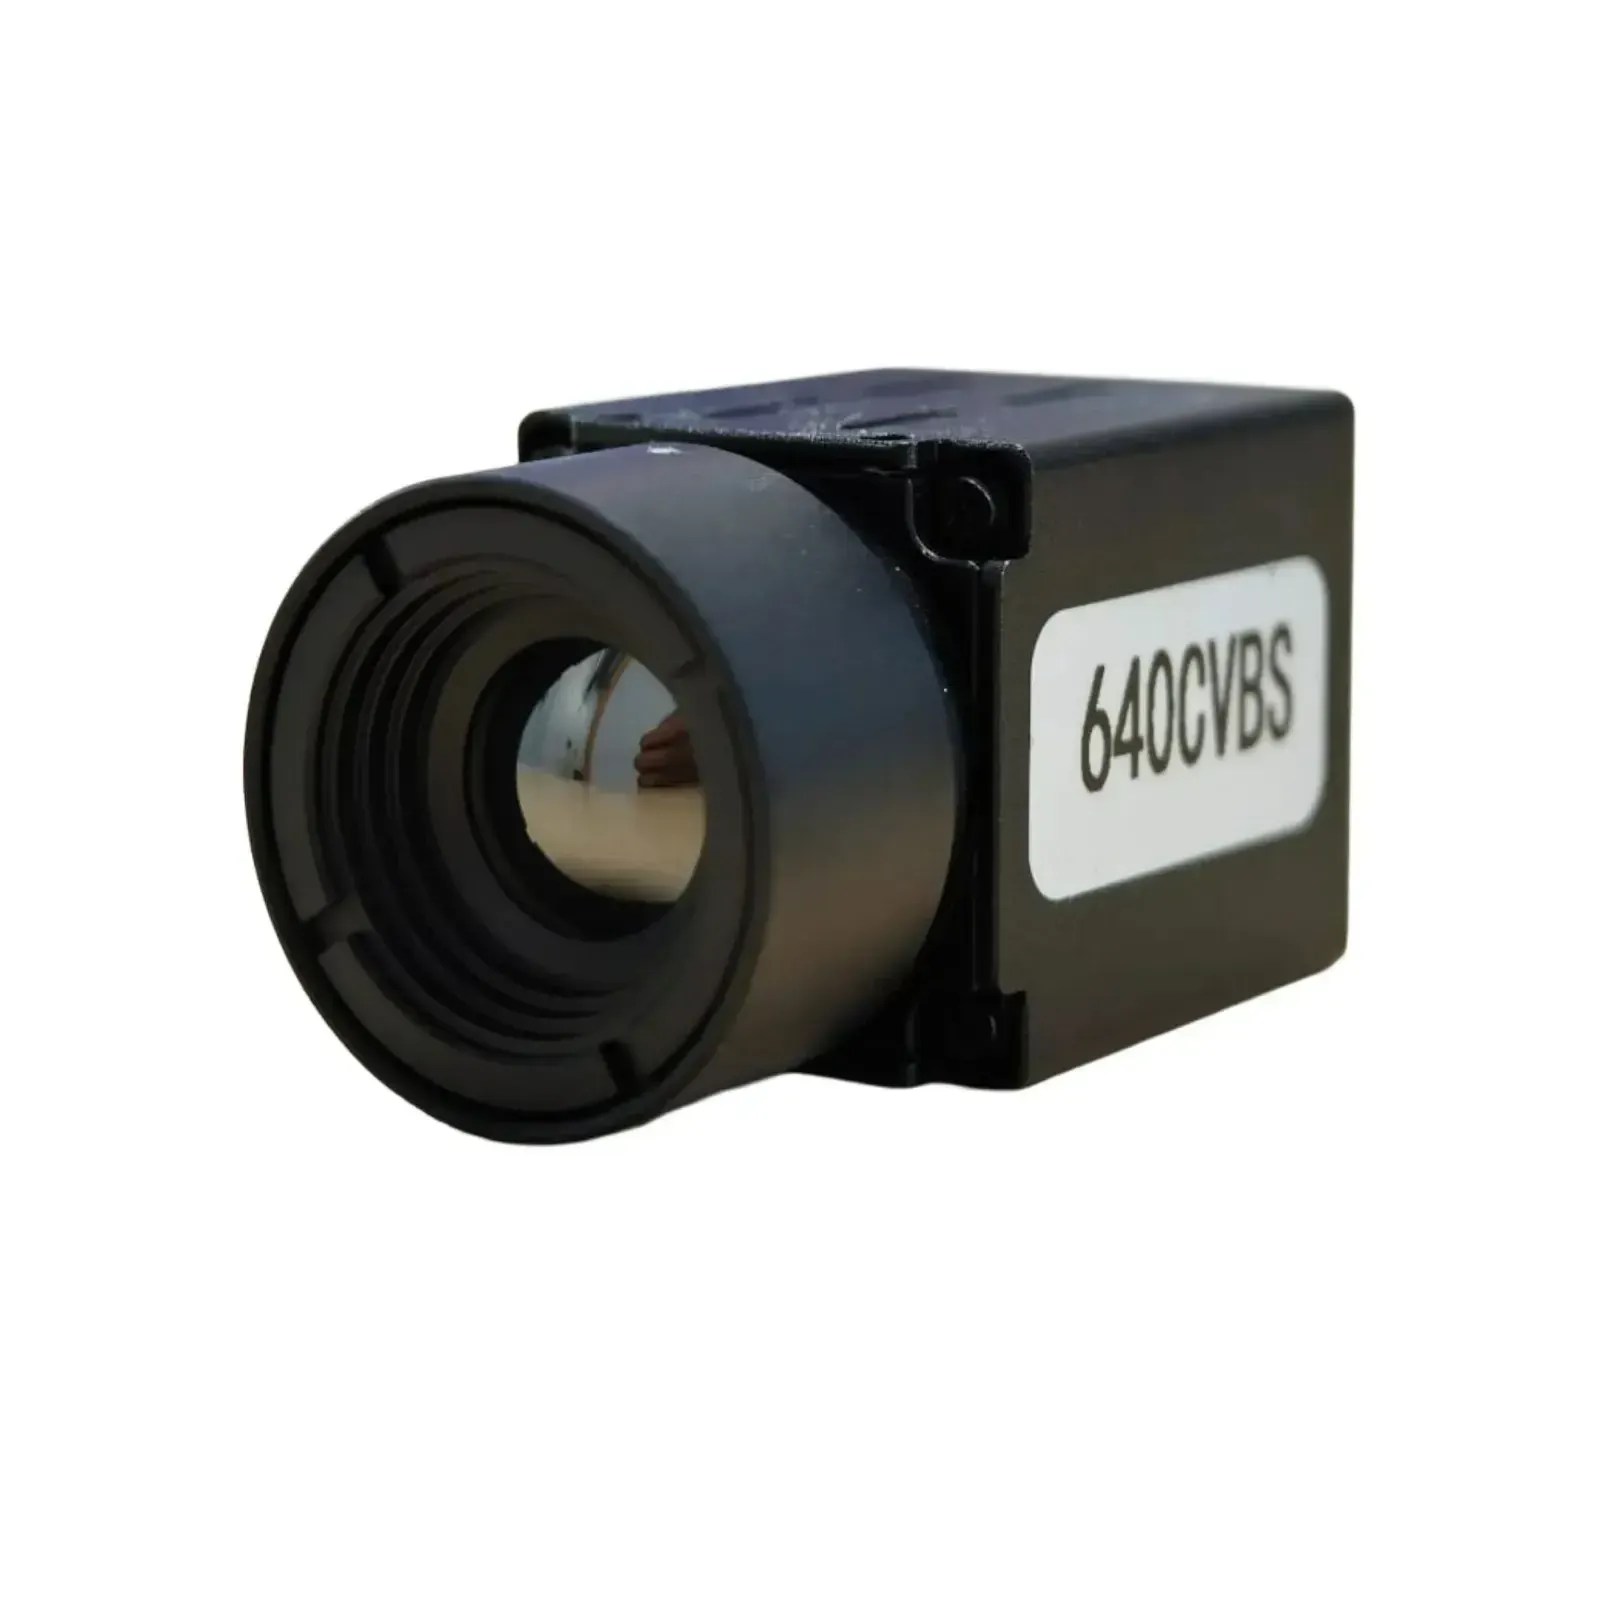
See in the Dark: For search and rescue, the High Resolution Thermal Imaging Camera 640 lets you see heat signatures through walls or forests.

-
Ignore the Noise: In crowded cities, radio signals get messy. The Atom Anti Jamming Module keeps your connection rock solid.
-
Stay Grounded: Don’t forget ground bots! Use the TowerPro MG995 Servo for robotic arms and the HC-SR04 Ultrasonic Sensor to keep your robots from bumping into walls.
10. How to Manage Your Lab Like a Pro
Don’t wait for a part to break to buy a spare. Keep a rolling inventory of high-turnover items:

-
Propellers: Keep plenty of Gemfan 51499 on hand.

-
Connectors: Use EFT XT90 Plug Holders to keep your wiring clean and vibration-resistant.
-
Big Projects: If you’re building a massive delivery drone, look into the JIYI KX Flight Controller Kit.


Summary: Your Shopping List 📝
If I were setting up my lab today with a budget in mind, here is exactly what I would cart:
-
Frame: Mark4 5-inch
-
FC/ESC: GEPRC Taker F405 Stack
-
Motors: Emax ECO II
-
Camera: Caddx Ratel 2
-
Tool: 60W Solder Pen (Essential for putting it all together!)
That’s it, guys. You don’t need a degree to start building—just some curiosity and the right parts.
If you get stuck on your build, you know where to find me. Now, stop reading and start soldering! 🔥


