
Choosing the Best Radio Transmitter for Your FPV Drone: A Beginner’s Guide
Choosing a radio transmitter for FPV drones can be overwhelming for beginners with so many options available. A radio transmitter is critical to controlling your drone in flight. This guide explains factors beyond price, such as supported frequency and protocols, channels, functionality, reliability, comfort, and software.
Some of the links on this page are affiliate links. I receive a commission (at no extra cost to you) if you make a purchase after clicking on one of these affiliate links. This helps support the free content for the community on this website. Please read our Affiliate Link Policy for more information.
Table of Contents
What Is A Radio Transmitter
A radio transmitter is a handheld device that pilots use to control their FPV drone in flight. It sends signals to the drone’s receiver, then the flight controller which translates those signals into drone movement.the transmitter is a crucial piece of equipment for flying FPV drones because it allows the pilot to control the drone’s movements with precision and accuracy. A high-quality transmitter with a reliable connection is essential for ensuring that the drone responds quickly and accurately to the pilot’s inputs. A comfortable grip and responsive sticks are important for a good piloting experience.
Some transmitters offer advanced features like customizable settings, telemetry data, and support for different protocols and receivers, allowing pilots to tailor their flying experience to their preferences and needs.
When you start flying FPV, buying a radio transmitter should be one of your first purchases. With it, you can practice flying in a simulator even before owning a drone. A good transmitter will last you a long time, unlike other accessories that may break or become outdated quickly. So, it’s worth investing a bit more in a high-quality transmitter.
New to FPV? Make sure to check out my beginner guide to FPV drones.
Radio Recommendations
Whatever radio you may choose, personally I would recommend they meet two minimum requirements:
- It runs EdgeTX firmware
- It has an built-in ExpressLRS RF module
These are currently the standard operating system and radio link in FPV radios.
Cheapest Worth Having
Radiomaster Pocket
Product Page:
- Looking for a budget-friendly radio transmitter that doesn’t skimp on features? Check out the Radiomaster Pocket, available for just $65. This compact and lightweight radio comes with cutting-edge EdgeTX and ExpressLRS built-in, making it a great value for beginners and experienced pilots alike.
Although the Pocket isn’t perfect, with some drawbacks to its small gimbal size and limited RF output power, it still has plenty of features, switches and support for FPV simulators, making it an excellent choice for those just starting out in the hobby with a tight budget. And with a battery life of 8+ hours, you won’t have to worry about running out of juice mid-flight.
Interested in learning more? Check out our detailed review of the Radiomaster Pocket to see if it’s the right radio for you.
If you are looking for alternative compact radios, the Jumper T-Lite V2 is also a great budget option in my opinion that’s packed with features.You can find out more in my review: https://oscarliang.com/jumper-t-lite-v2/. But it’s quite a bit older than the Pocket and has lower RF output power.
Best Value and Versatility
Radiomaster Boxer
Product pages:
- AliExpress: https://s.click.aliexpress.com/e/_DlU98NH
- Radiomaster: https://oscarliang.com/product-bccn
- GetFPV: https://oscarliang.com/product-2yj0
- RDQ: https://oscarliang.com/product-tjkh
The Radiomaster Boxer is perhaps one of the best value and versatile radios on the market.
With a powerful built-in 1W ExpressLRS 2.4GHz module, it offers basically everything the TX16S does except the color touch screen, but at a much more affordable price point. Check ou if you’re interested.
Portability and Performance
Jumper T20S
Product Page:
The Jumper T20S radio transmitter offers the functionality of a full-sized radio in an impressively compact form. This has been my daily driver since early 2024 mainly because of its portability.
It offers a blend of best features cherry-picked from Jumper’s previous models. It sports advanced technology, including an internal ExpressLRS module, and comes pre-installed with the popular EdgeTX firmware.
What sets the T20S apart is its versatility. It has full-sized gimbals along with an array of 10 switches, 6 sliders, and 6 flight mode buttons. This ensures it suits both multirotor pilots and those flying planes. Its ergonomic design provides a comfortable grip, and its weight is more manageable than full-sized competitors.
Battery life is also impressive, with up to 14 hours of runtime. Despite a few minor shortcomings like slow charging and absence of a gimbal protector, the T20S offers exceptional value, making it highly recommendable for both beginners and seasoned pilots. Build quality and gimbal quality might not be the best, but for $110 it still makes a great deal.
If you want ELRS Gemini feature, there’s a Gemini Version of the T20S as well: https://oscarliang.com/jumper-t20s-gemini/. Radios with Gemini features are a bit expensive and personally I think it’s overkill for the average hobbyists. The cheaper, regular version should be good enough.
Best Radio with Color Screen
Radiomaster TX15
If you prefer a radio with a large color touch screen, the Radiomaster TX15 is definitely worth considering. Similar form factor to the Boxer, comes with full size gimbals, and offers excellent performance and quality for the money.
Product pages:
- AliExpress: https://s.click.aliexpress.com/e/_opSbalb
- GetFPV: https://oscarliang.com/product-5gtb
- RDQ: https://oscarliang.com/product-jooc
- Radiomaster: https://oscarliang.com/product-gmlr
The Radiomaster TX15 stands out for its great combination of features, performance and price. With a traditional layout and form factor, this radio provides excellent ergonomics and versatility. The full-size hall sensor gimbals provide a full range of stick travel and excellent precision. The large color screen is probably the highlight of this radio making it easy to use and perform powerful tasks. At $139, this radio offers a lot of value for the price. Check out our review of the Jumper T15 for more details: https://oscarliang.com/radiomaster-tx15-max/
For Dedicated DJI O4 Users
If you only fly with the DJI O4 or O4 Pro Air Units, you might be interested in the DJI Remote Controller 3. It’s highly portable—one of the most compact FPV radios available. It simplifies your drone build and reduces overall cost since it doesn’t require a separate receiver; the O4 Air Unit can double as the receiver when using this remote. This results in a lighter and cleaner setup, which is ideal for micro drones with strict weight and space constraints. Personally, I use it as a secondary radio for micro drones that don’t have an ELRS receiver.
I have a whole guide explaining how to set up the DJI Remote Controller 3: https://oscarliang.com/setup-dji-rc3-o4-betaflight/
You can purchase the DJI Remote Controller 3 from:
- AliExpress: https://s.click.aliexpress.com/e/_oEg6wVp
- GetFPV: https://oscarliang.com/product-bc4y
- RDQ: https://oscarliang.com/product-g7hk
- Amazon: https://amzn.to/41TbN8s
- NBD: https://oscarliang.com/product-c05t
Radio Firmware
The radio firmware is like the operating system of the radio – like Windows or Linux for computers. It serves as the interface that allows you to interact with the radio and control your drone.
In 2025, EdgeTX is the go-to firmware.
As long as the radio comes with EdgeTX, you are good to go. It’s open source and has a large user base. Most radio transmitters on the market support EdgeTX and come with it pre-installed, making it easy to transfer your settings to a new radio when you upgrade. EdgeTX is highly configurable and offers support for many different types of aircraft. While it may have a steep learning curve for new comers, the knowledge gained from using it will be invaluable in the long run.
While OpenTX used to be a popular firmware, it has fallen behind EdgeTX in terms of features and capabilities. Other firmware options include FreedomTX, which is based on OpenTX and is used in TBS Tango 2 and Mambo, as well as Frsky’s latest radios which use ETHOS. But these firmware are specific to certain radios.
Radio Link
Before picking up a radio, it’s important to consider which radio link you want to use. It’s recommended to stick with a popular radio link to ensure you have access to online help and better resale value.
The most popular systems used in FPV drones today include:
- ExpressLRS (2.4GHz and 868MHz/915MHz)
- TBS Crossfire (868MHz/915MHz)
- TBS Tracer (2.4GHz)
- Immersion Ghost (2.4GHz)
- Frsky ACCST V1/V2 (2.4GHz)
- Frsky ACCESS (2.4GHz)
- Flysky
- Spektrum
In 2025, the go-to radio link is ExpressLRS.
ExpressLRS (ELRS) is undoubtedly the most popular radio link for FPV pilots currently for its affordability, high performance, open source nature, and cutting-edge features. You can’t go wrong with it.
Some radios come with radio link built-in (internal RF module), while others have an external module bay that can be used to install an external RF module. Having an external module bay gives you more flexibility when choosing a radio link, however buying a separate module can be expensive and adds to the bulkiness.
Once you’ve decided on which radio link you want to use, your radio choices will be narrowed down significantly.
Form Factor
When it comes to radio transmitters, there are two main styles: full size and gamepad style. Gamepad style radios are very compact but tend to have fewer features, such as less battery capacity, smaller gimbals, fewer switches, and smaller screens. This can make them less comfortable to hold, especially for those with larger hands or who prefer “pinching” the sticks.
On the other hand, if size is not an issue, a full size radio may be the more versatile option. Full size radios generally have ergonomics that works for a wider range of people, and the standard size gimbals provide better resolution and precision. Ultimately, the choice comes down to personal preference and what feels most comfortable for the individual pilot.
Ergonomics
It’s true that evaluating the ergonomics of a radio transmitter can be challenging when buying online. However, it’s still an important factor to consider as comfort and control are crucial for flying FPV drones.
Apart from radio size, the design of the radio is also important, and factors such as hand grip, the presence of a lanyard loop, and the location and types of switches should be considered. The weight of the transmitter is another factor to take into account, as a heavier radio may cause fatigue over time, while a lighter one may feel less substantial to control the drone accurately.
While reputable manufacturers are likely to consider ergonomics when designing their transmitters, there’s still a wide range of variation in terms of grip, switch placement, and weight distribution etc.
Attending local meetups and trying different radios from other pilots can be a great way to get a feel for what works for you. Alternatively, you can also read reviews and watch videos from trusted sources to get an idea of the ergonomics of different radio models before making a purchase.
Gimbals
The two sticks on a radio are called gimbals, and they are responsible for controlling the movement of your drone. As a pilot, you use the gimbals to give commands to your drone, such as:
- Throttle: You control the speed of the motors, which affects the drone’s overall speed.
- Pitch (Elevator): This command makes the drone rotate along its lateral axis, moving it forward or backward.
- Roll (Aileron): This command makes the drone rotate along its longitudinal axis, moving it left or right.
- Yaw (Rudder): This command makes the drone rotate along its vertical axis, turning it left or right.
Here’s is an animated demonstration of how the drone react to each stick movement:
Gimbal Types
When it comes to gimbals, there are two main types to consider: Potentiometer and Hall Sensor.
Potentiometer based gimbals are less expensive, but they wear out faster due to physical contacts in brush joints causing friction. On the other hand, Hall Sensor gimbals use magnets to determine the stick position and therefore are more durable.
Potentiometer Gimbal
Hall Gimbal
Apart from increased longevity, Hall Sensor gimbals also offer better accuracy and resolution with reduced jittering. Some even claim hall gimbals are smoother but that sometimes can be subjective. While beginners may not notice a huge difference in gimbal quality, it becomes an important consideration as you grow as a pilot.
Regardless of the type of gimbals, you can usually adjust the spring tension to achieve a preferred stick feel. This is often a matter of personal preference, and it can have a significant impact on your control precision.
There are two gimbal sizes: full size gimbals and mini gimbals. Full size gimbals are larger and give you better precision due to the longer stick travel while mini gimbals are more compact. You tend to find full size gimbals in full size radios, and mini gimbals in gamepad style radios.
Modes
Radio mode refers to the configuration of the throttle, yaw, pitch and roll controls, so there are four modes to choose from: Mode 1, Mode 2, Mode 3, and Mode 4. Most modern radios allow you to switch between these modes in the software, so normally you are not locked into a specific mode when purchasing your radio, be sure to check though if the radio you are buying support mode switching.
There is no right or wrong choice when it comes to radio modes, and it’s just a matter of personal preference. However, if you’re unsure which mode to choose, just go with Mode 2, as it’s the most commonly used mode among FPV pilots. Most radios also ships with Mode 2 out of the box.
Mode 2 has the pitch and roll controls on the right joystick and the throttle and yaw on the left. The right joystick self-centers in both axes, while the left joystick only self-centers in the yaw axis and the throttle stays wherever you leave it to allow for constant throttle.
Some people might have trouble flying with mode 2, but when they tried mode1, mode 3 or mode 4 it just clicked for them. So don’t be afraid to try other modes. Most modern radios allow you to switch between all four modes by simply adjusting the hardware and software, so you can try out each mode without needing to buy a new radio.
Control Style
The way he’s holding the sticks is called “pinching”
The way you hold your gimbals is an important factor to consider when choosing a radio transmitter. Identify if you’re a “thumber” or “pincher.” Some radios are better suited ergonomically for pinching (more space around the gimbals), while others cater more naturally to thumbing.
If you prefer pinching the gimbal sticks with two fingers, longer sticks might be more suitable for you. However, if you prefer using only your thumbs to move the gimbals with the rest of your fingers wrap around the back of the radio, you will need shorter sticks.
I have a whole post explaining the different ways of holding the sticks and benefits. There is no right or wrong way, it’s purely personal preference.
Stickends
tip of a gimbal stick is called “stick end” and they are usually replaceable. You can try different types of stick ends and find which ones work best for you as it’s mostly just a personal preference. Here are the stickends I am currently using and would recommend: Radiomaster Sticky360 Stickends.
Not all gimbal sticks are compatible with all radios, the main difference is in the thread size. Gimbal sticks are normally either M3 (3mm diameter) or M4 (4mm diameter) threads, so it’s important to check the compatibility before purchasing stick ends.
- FRSKY Taranis Standard Gimbals – M3
- FRSKY Taranis Hall Effect Gimbals – M4
- FRSKY X-LITE – M2.5
- TBS TANGO 2 – M3
- TBS Mambo – M3
- Jumper T-Lite v1/v2 – M3
- Jumper T-Pro
- Jumper T12 Pro – M3
- Jumper T16 – M3
- Jumper T18 – M3
- Jumper T20S – M3
- Jumper T15 – M3
- Radiomaster TX16S – M4
- Radiomaster Boxer – M4
- Radiomaster AG01 Gimbals – M4
- Radiomaster AG02 Gimbals – M4
- Radiomaster Mini AG01 Gimbals – M3
- Radiomaster Zorro – M3
- Radiomaster TX12 – M3
- Radiomaster Pocket – M3
- Radiomaster GX12 – M3
- Radiomaster TX15 – M4
Some gimbals and stickends allow you to adjust the length of the stick. Generally longer sticks allows more precise control while shorter sticks are more responsive.
Switches

Radio transmitters come equipped with an array of switches that you can use to arm your drone, activate flight modes, and perform other functions.
These switches can come in latching two-position or three-position forms, momentary switch (toggle), as well as sliders and rotary knobs. However, as FPV drone pilots, we don’t typically need as many switches as fixed wing flyers do.
For most FPV pilots flying multirotors, 2 to 3 switches are all you need. Typically, you will need one switch for arming, another switch for flight modes, and perhaps a third switch for beeper. While having more switches can certainly be helpful, they are by no means necessary if you’re primarily flying freestyle and racing.

Some radios also come with buttons instead of traditional switches, typically positioned on the shoulders for easy access. Buttons are more streamlined, low-profile, and better for portability—but when it comes to practicality, stick switches are generally superior.
Radio Transmitter Frequency
Left: 868MHz antenna; Right 2.4GHz antenna.
Radio transmitter frequency is an important factor to consider when selecting a transmitter for your FPV drone. Two of the most commonly used frequencies in the FPV drone community are 2.4GHz and 900MHz.
2.4GHz is the current standard for radio control and is legal for hobbyist use in most countries. Its smaller antenna size makes it a popular choice among pilots.
On the other hand, 900MHz is often used for long-range flying due to its better signal penetration and reliability. While it has narrower bandwidth and requires much larger antennas than 2.4GHz, it is still preferred by some pilots because of its lower frequency. It’s worth noting that the exact operational frequency for 900MHz band differs depending on the region, with most of the world using 915MHz while the EU uses 868MHz.
While there are other less common frequencies used in RC, such as 27MHz, 72MHz, 433MHz, and 1.3GHz, they are either obsolete or used in other specific applications. For FPV drones, it is best to consider 2.4GHz or 900MHz.
External Module Support
Additionally, having an external module bay on the back of the radio can be useful in case you want to upgrade to a different radio system in the future. Instead of buying a whole new radio, you can simply purchase an external module that is compatible with the new system.
It’s important to note that not all radios have an external module bay, so if you think you may need one in the future, be sure to look for a radio that has this feature.
There are two sizes of external module bay: JR module and Lite module (also known as nano or micro size). Take note of this if you are buying an external radio module.
This is JR module bay:
This is Lite module bay:
Radio Receivers
The receiver is responsible for receiving the user’s commands from the transmitter and passing that data to the flight controller. However, you can only use receivers that are compatible with the RF link you use, as they need to use the same protocol as the transmitter. Here is an overview of all the TX protocols and RX protocols.
A protocol is like the language spoken between the transmitter and receiver. When you buy a radio transmitter, you are also committing yourself to specific receivers and ecosystem, which has an impact on your budget and feature options. Some brands may have more expensive receivers, while others may have better options for lightweight receivers for smaller drones. Additionally, some brands may not offer certain features like telemetry.
It’s important to remember that you’ll need to purchase a receiver for every quad you build, so the cost can add up quickly if you have multiple drones in your fleet. Take the time to consider which receiver brand and protocol will work best for you and your specific needs.
Binding Radio and Receiver
Binding is the process of establishing communication between a radio transmitter (TX) and receiver (RX), which only needs to be done once usually.
The process of binding is typically straightforward, but the steps can vary depending on the radio link.
Receiver Compatibility
When you purchase a radio controller, you’re not just buying a device – you’re investing in a radio link that you’ll continue to build on in the future. It’s crucial that each receiver you purchase is compatible with your radio, and you’ll need a new receiver for every drone you own.
As mentioned earlier, both the radio transmitter and receiver must use the same protocol to be compatible.
Since ExpressLRS is open source, any ExpressLRS-compatible receiver and transmitter—regardless of brand—will work together, as long as they are running compatible firmware versions. On the other hand, proprietary radio links like TBS Crossfire, FrSky, and Flysky require you to use both transmitter and receiver from the same brand and protocol.
To avoid surprises, you can pick your receivers from my receiver round-up based on the RC link you are using:
Range
Not all radio control links are created equal when it comes to range. A number of factors can influence the effective range of an RC radio system, including:
- Frequency
- Radio link technology
- RF output power
- Antenna type and placement
- Environmental conditions
As a general rule, lower frequencies tend to offer better long-range performance due to their superior ability to penetrate obstacles and follow terrain. However, newer radio link technologies like 2.4GHz ExpressLRS with LoRa modulation have proven to be incredibly capable, offering long-range performance that rivals lower-frequency systems. I switched from 868/915MHz TBS Crossfire to 2.4GHz ExpressLRS in 2022 and never looked back. It’s more affordable, the antennas are smaller, and it easily meets my range needs.
That said, not all 2.4GHz systems are created equal. For instance, older FrSky 2.4GHz systems like ACCST V1 and V2 are notoriously known for having bad range (~1km to 1.5km). In contrast, ExpressLRS can deliver several kilometers of range at just 100mW RF output power.
Increasing your radio module’s RF output power can help extend range. Some radios and modules support up to 1W of output, but 100mW to 250mW is more than enough for most ExpressLRS users. Keep in mind that higher power levels can increase battery consumption and potentially interfere with your video signal.
Receiver sensitivity and diversity also play an important role. Receivers with dual antennas offer diversity reception, which can improve signal reliability by minimizing dropouts caused by interference or poor antenna orientation. Antenna positioning is also crucial—misaligned antennas can reduce signal strength significantly. Learn more in this guide: https://oscarliang.com/antenna-positioning/
For optimal range and reliability, maintaining line-of-sight between the transmitter and receiver is ideal. Obstacles like trees, buildings, and terrain can degrade the signal. Also be aware of potential sources of interference nearby, such as Wi-Fi routers, cell towers, or high-voltage lines. To better understand your radio link’s performance, check out this tutorial on how to interpret LQ and RSSI values: https://oscarliang.com/lq-rssi/
Battery
Most radios come with swappable batteries, supporting both LiPo and Li-ion options, and can be conveniently recharged using the USB-C port on the radio. This flexibility ensures you’re less likely to run out of battery in the field, which could cut your flying sessions short.
There are ways to extend battery life, such as reducing the RF output power (if adjustable) and lowering the screen backlight brightness. While using a larger battery could be an option, it’s not always ideal—the added weight can affect the control feel and lead to fatigue during longer flying sessions.
 High Resolution Thermal Imaging Camera For FPV Drone 640
  OVONIC 1300mAh 100C 4S1P 14.8V Lipo Battery with XT60 Connector for RC FPV Racing Drone Quadcopter
  Radiomaster XR1 Nano Multi-Frequency ExpressLRS Receiver – 2400
  MAD Motor – BSC 3115 900 Kv FPV drone motor
  HQProp 15X10 (1CCW+1CW) Black-Glass Fiber Reinforced Nylon
  Caddx Ratel 2 1/1.8″” 1200TVL 2.1mm Camera Black
 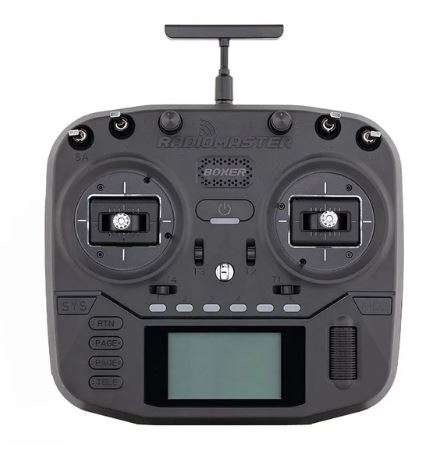 Radiomaster Boxer 2.4GHz Radio controller (M2)- ELRS